Help - Groups
Groups serve two main functions:
1. Access Permissions
COSHH forms can be set to be 'group visible' so that anyone in a group assigned to the COSHH form can view and sign it, but those not part of the Group cannot.
2. Quality Control/ Secondary Approval
Groups can be set with a 'quality controller' or 'secondary approver'. It allows you to change the standard approval workflow to add an extra step - any COSHH form created by a member of the group is sent first to the QC before it is submitted to the Responsible Person for approval. For example, if you have a lab manager or senior post doc who you want to have first sight of all COSHH assessments created in your group, you can set them up as the QC. Once they are satisfied with the form, they can forward it to the person responsible for final approval. QC only applies when both the Author is in the group AND the COSHH is carried out in lab that belongs to the group.
Groups also provide a tool to send an email to the members of the group.
Creating a group
DSC, OHSaW and Admin level users can create groups. PIs and standard users can only view groups they belong to.
- login to the system
- click on groups & sections
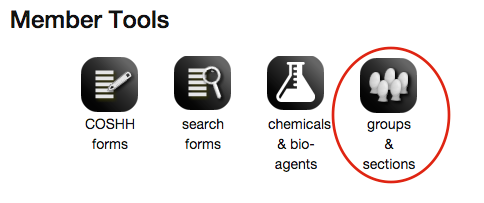
The screen will update to show any groups you have responsibility for. This may be blank to start with.

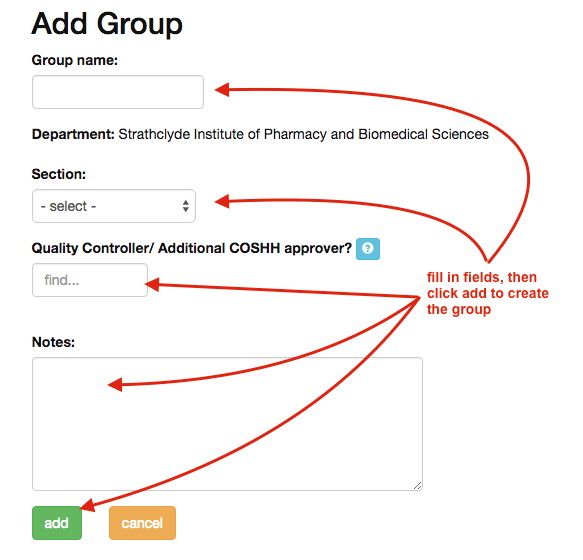
- click on ' create group'
The screen will update to show a form, fill in the various fields and click the add button. This will create the group.
Managing group membership and resources
Each Group consists of users and optional labs. If you are using the QC option on a group, COSHH forms associated with these labs will be redirected to the QC user before the RP.
- login to the system
- click on groups & sections
The screen will update to show any groups you have responsibility for.
Click view to show the current group membership and resources.
Add a group member
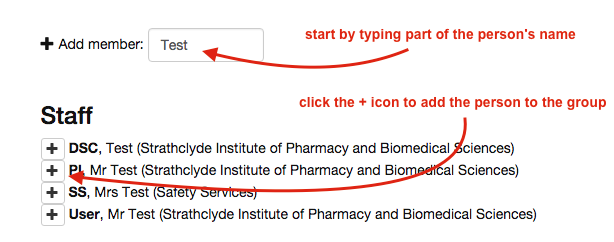
- type in the find user box next to Add member to add a new member to the group
- a list of matching users will appear
- click the '+' icon next to the user to add them to the group
Add a laboratory
- type in the find lab box next to Add lab to add a new lab to the group
- a list of matching labs will appear (Tip: enter the number of the lab first, rather than the building name)
- click the '+' icon next to the lab to add it to the group
- lab/room sets can also be used to add all the labs in a set to the group
Dropping members/ labs
The group owner and group editors can drop group members to remove them from the group. To drop a member or lab:
- click the drop button next to the user or lab on the view group screen
- the following screen, confirm you wish to remove them from the group
or
- cancel if you wish to back-out.
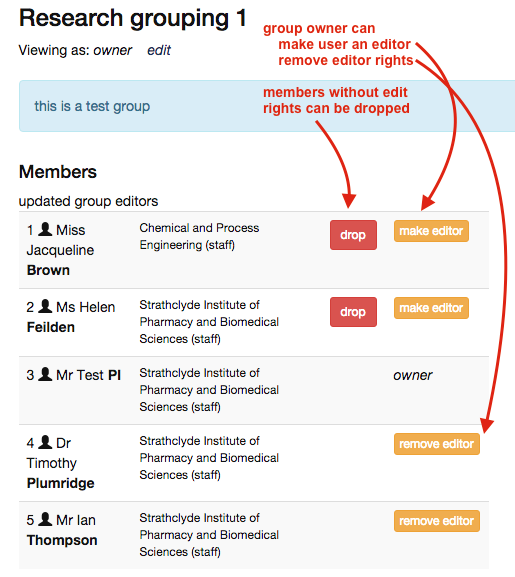
You cannot drop group editors directly. The group owner can remove the editor rights from the user, then they can be dropped.
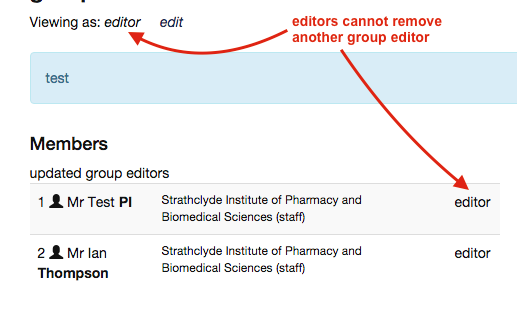
To drop an editor:
- the group owner should remove the editor rights from the group member by clicking the 'remove editor' button next to the group member
- the member can then be dropped
Emailing a group
- login to the system
- click on groups & sections
The screen will update to show any groups you have responsibility for.
- click the send email link
- fill in the subject and message fields
- click send
- check the email contents, and click ok
You will be told how many users will be emailed. Click OK to confirm the email and it will be sent to the users.